
Student Union · Self Serve
Your event setup, step by step.
Follow these steps in order. Take your time, check each item, and save Production Support before your event starts.
Before you start
This guide is only for Student Union Self-Serve events. Read each step before touching the equipment.
Make sure you scanned the correct QR code.
If your event is not Self Serve and you were given access to the production room, use the instructions posted inside that room instead.
Turn on the projectors
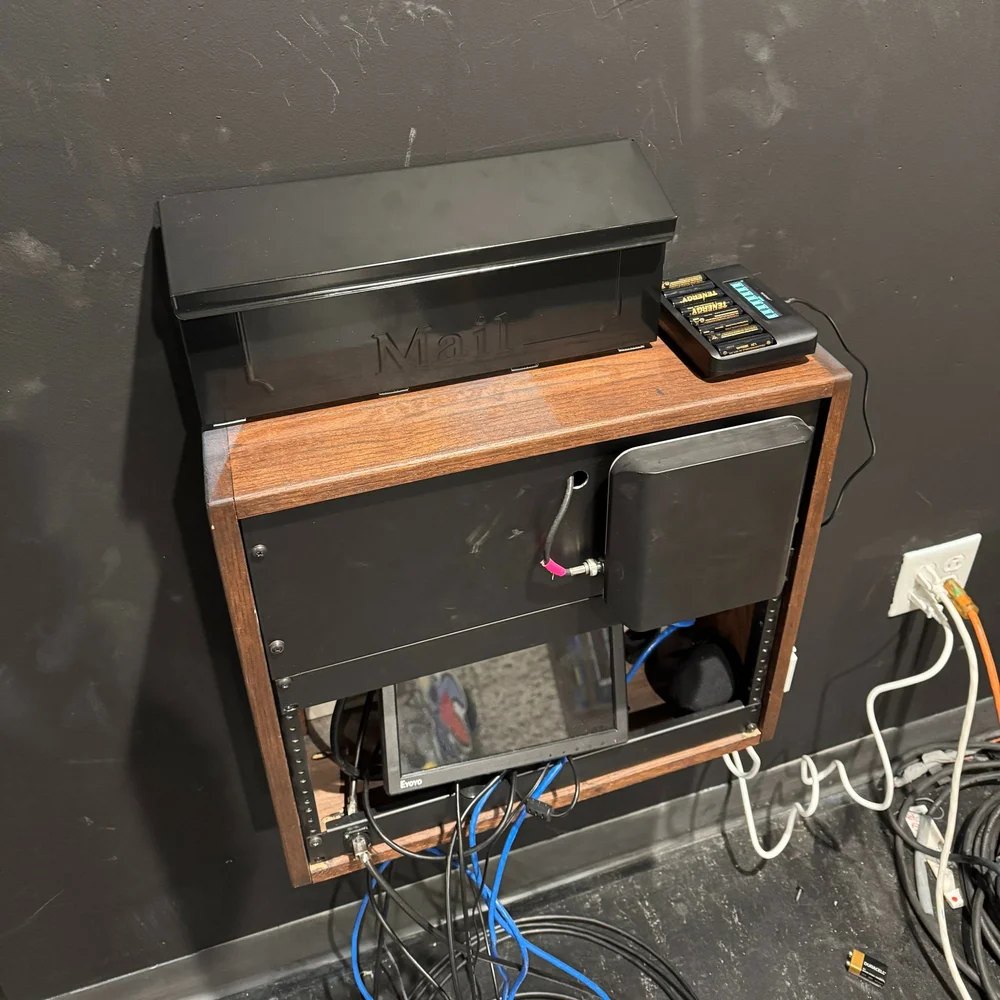
Start at the equipment hub on stage right. Stage right means your right side while standing onstage and looking out into the room.
- Find the black mailbox shown in the photo.
- Take out the projector remote.
- Use the remote to power on the projectors.
- A flashing light at the bottom means the projector is starting.
Set up the microphones
Two wireless microphones are available. You will find them in the mailbox, with rechargeable batteries stored to the right.
- Twist the bottom of the microphone to open the battery compartment.
- Insert a charged battery, then close the bottom gently. Do not overtighten it.
- Hold the red power button until the microphone screen lights up.
- Check the mute switch next to the red power button before speaking.
Present with AirPlay
Use AirPlay to send content from a compatible Apple device to the projector screens.
Shut everything down
Complete this checklist before leaving the room. This protects the equipment and keeps it ready for the next event.
- Use the remote to turn off both projectors.
- Hold each microphone’s red button until its screen turns off.
- Return the microphones, batteries, and remote to their storage area.
- Check the room one more time before you leave.